


How to Make a Beautiful Gift Hamper at Home: Easy NZ Guide
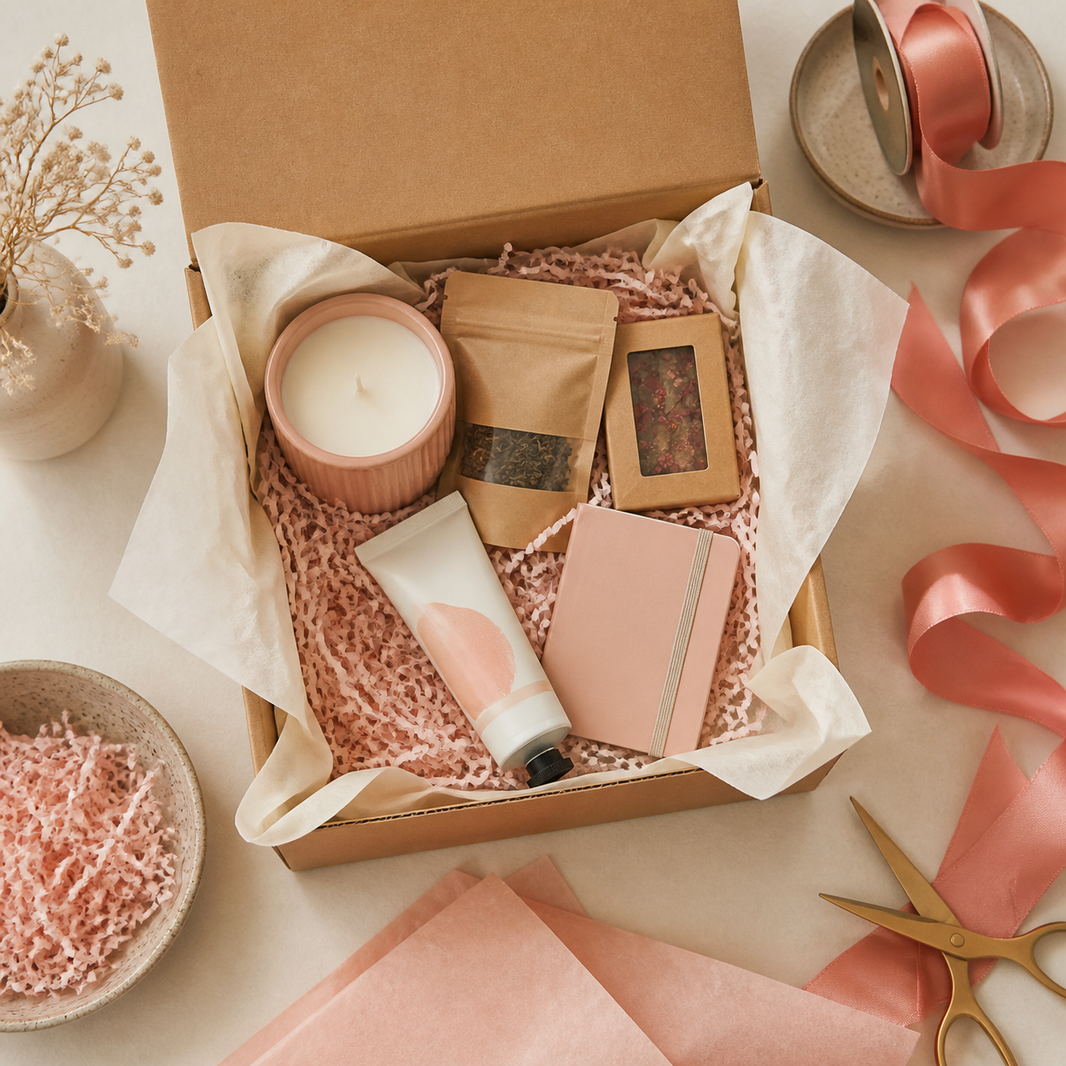
A thoughtfully arranged gift hamper feels generous, personal and polished—but it does not need to be expensive or complicated. With the right box, a little structure and a few finishing touches, you can create a beautiful hamper at home for birthdays, thank-you gifts, housewarmings, new parents or just because.
This easy New Zealand guide walks you through the process from choosing the box to tying the final ribbon.
What You Need to Make a Gift Hamper
- A sturdy gift box: Choose a box that fits your gifts without leaving too much empty space. A medium craft gift box is a versatile starting point, while our gift box collection has black, white and kraft options in different sizes.
- Tissue paper: Use coloured tissue paper to line the box and frame the contents.
- Protective filler: Shredded paper filler supports the products, adds height and helps stop items from moving.
- Ribbon: A length of premium satin ribbon instantly makes a simple box feel gift-ready.
- Your chosen gifts: Aim for three to six items with a mix of shapes and heights.
Step 1: Choose the Right Box Size
Lay all your gifts together before choosing the box. The ideal box is large enough for everything to sit comfortably, but not so large that the items disappear inside it. As a simple guide, allow a small border around the arrangement and enough depth for a layer of filler underneath.
Choose kraft for a warm, natural look, white for a clean and modern hamper, or black for a more dramatic premium finish.
Step 2: Pick a Simple Colour Palette
Two or three colours are usually enough. Match your tissue paper and ribbon to one colour already found in the gifts. Soft pink and ivory feel warm and celebratory; kraft and green create a natural look; black, white and gold feel more formal.
A limited palette helps products from different brands look like one carefully planned gift.
Step 3: Build a Soft Base
Line the box with one or two sheets of tissue paper, leaving the edges loose enough to fold over later if you wish. Add shredded paper filler across the base. Use a little more at the back or beneath smaller gifts to create different heights.
The filler should hold the products securely without completely covering them.
Step 4: Arrange the Gifts
Place the tallest or largest item towards the back, then arrange medium items around it. Keep small treats or accessories near the front where they can be seen. Turn labels towards the person opening the hamper and leave a little breathing room between products.
Before finishing, gently tilt the box. If anything slides, add extra filler around the base rather than packing the top too tightly.